
Do you want to know about Setting up a static IP in Mac OS X? Here are the steps that help you to set up a Static IP Address in Mac OS X. Static IP Address is a private & permanent IP Address that can be assigned to the local network.
What is Static IP & its use?
Most importantly the Static IP Address plays a key role in certain situations in the places where dynamic IP address could not work. Some of those specific scenarios are client to client files sharing on the local network, forwarding port details & using DNS dynamically. The IP address that would be assigned when your Mac is connected to a private network from home or Office is known as dynamic IP Address.
Whenever the Static IP Address is created in Mac, then a private & permanent IP Address will set up for you that doesn’t change from day to the next day. This is most useful as the other devices connected to the local network would be able to access the Mac for particular requirements. Based on the port forwarding enabled, certain services should be accessible to the others.
Setting up a static IP in Mac OS X
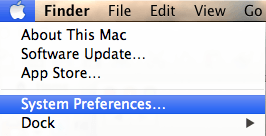
1. From the top menu bar, select apple menu.
2. Choose ‘System Preferences’ from the options available.
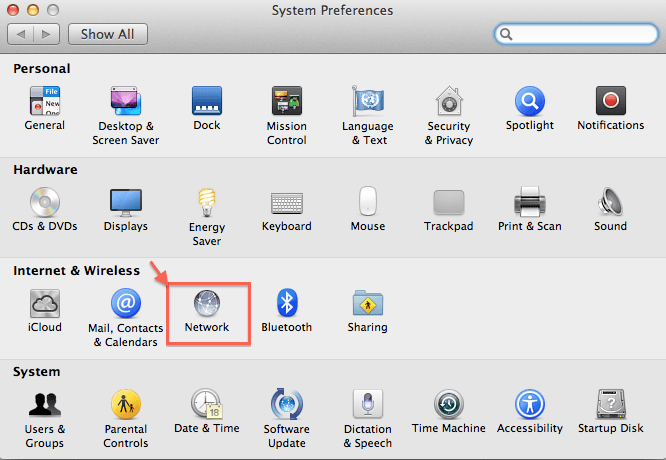
3. System Preferences window will open and choose the ‘Network’ under Internet & Wireless category.
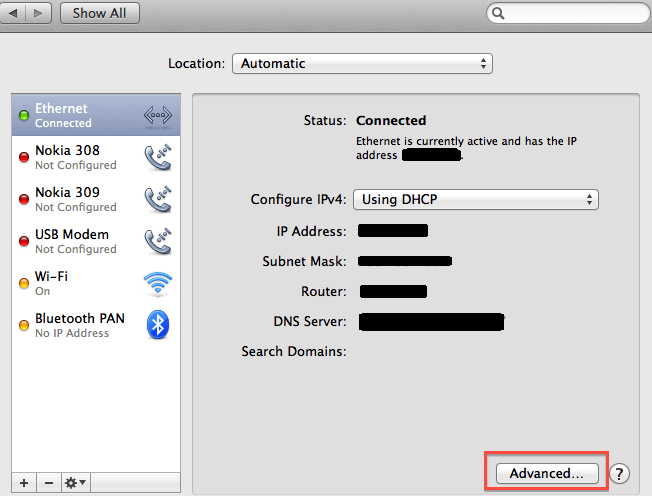
4. Network window will open. Then select the active network connection from the side bar menu.
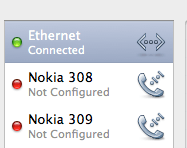
5. Connection used will display the status under the connection name as ‘Connected’.
6. By default from the sidebar, first one will be the connected network interface.
7. Please make sure that the current IP address is noted which is assigned to your Mac. From within the private IP addresses range list, you need to select the new IP Address.
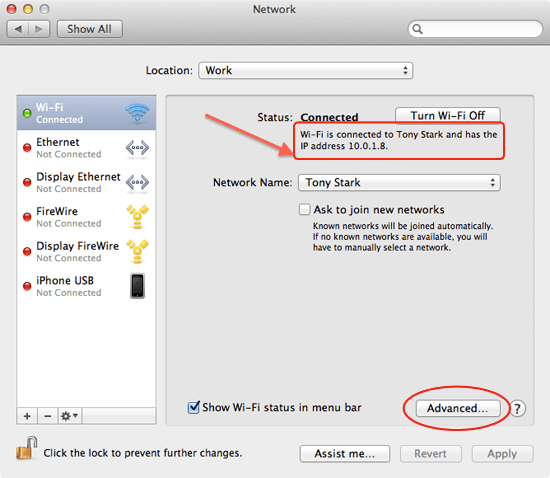
8. Click on the ‘Advanced’ tab at the bottom right corner of the window.
9. A new window will open and select the ‘TCP/IP’ tab.
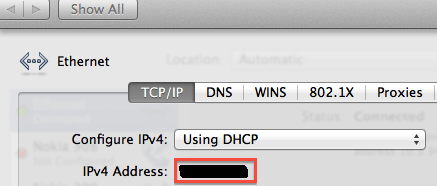
10. Select the ‘Manually’ option from the Configure IPv4 selection menu.
11. You can enter the static IP Address in the ‘IPv4 Address:’ field.

12. The real factor here is how would be the static IP address entered and what number should we enter. One best way is to pick the static IP from the current IP address range list.
Suppose the current dynamically assigned IP address was 10.0.1.9, then pick any address between 10.0.1.0 and 10.0.1.255 and make sure that the address was not already assigned to any other device.
13. Click on the OK button.
14. Finally click on the Apply button to update the changes.
- You May also Like : How to Configure Multiple Network Locations on Mac
- How to find MAC address on Mac
- 3 Best Ways to find IP address on Mac
Now you know about Setting up a static IP in Mac OS X? and how the static IP Address is useful in specific scenarios. If this tutorial helped you, please share it and follow us on social media please like us on Facebook or Twitter. Subscribe to WhatVwant channel on YouTube for regular updates.